- For information about maps rather than the interface for maps, see Map.
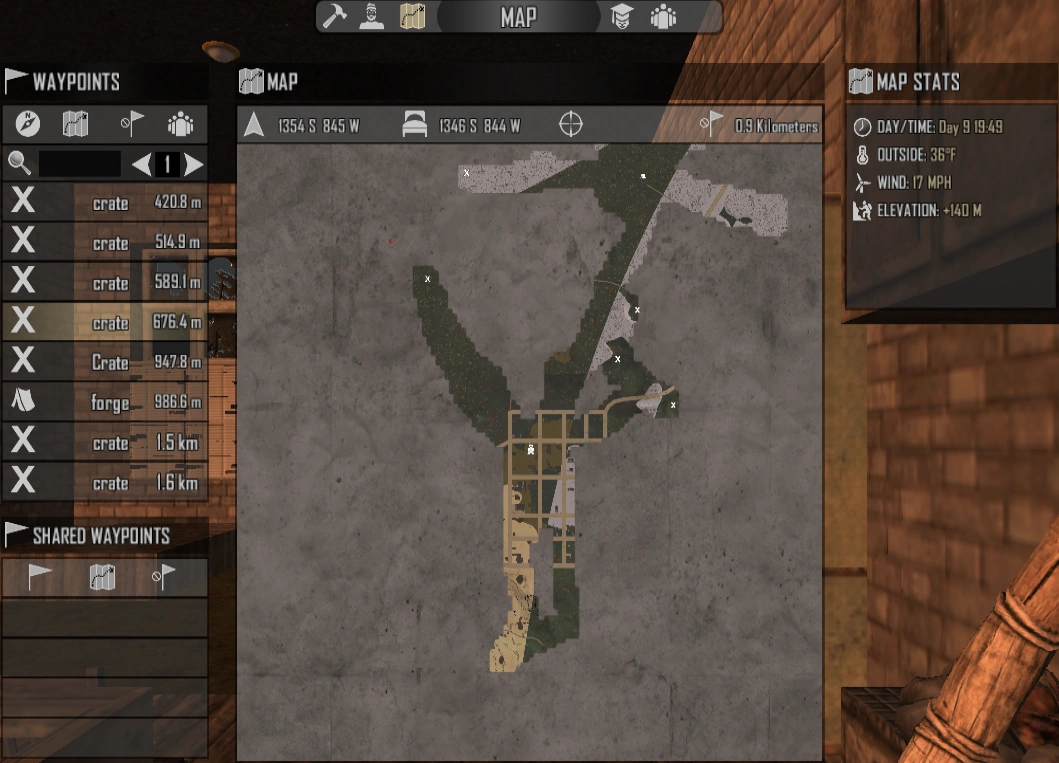
Here the player has marked several waypoints on the map for personal reference and has no shared waypoints.
The Map Menu activates when a player uses a keyboard-shortcut ("M" key by default) or by clicking the map icon ![]() at the top of the menu while accessing one of the other main menus such as Character Menu, Looting Menu, or Crafting Menu.
at the top of the menu while accessing one of the other main menus such as Character Menu, Looting Menu, or Crafting Menu.
From the map menu the player is able to manage waypoints (personal and shared) as well as view the map and access map stats, such as the current day and time, outside temperature, wind speed, and elevation.
Components[ | ]
The Map Menu has three major components:
- Map, which is the actual map indicating areas the player has visited (the map reveals more as the player visits an area).
- Waypoints, which allow a player to mark a point on a map for later reference.
- Shared Waypoints, which displays information about shared waypoints.
Waypoints[ | ]
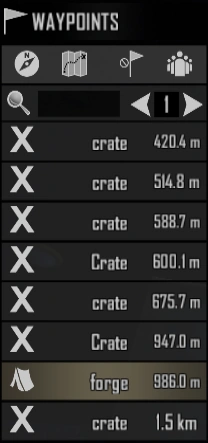
The four waypoint options are shown at the top of the pane. Waypoints are listed below, with "forge" being the highlighted waypoint.
The menu for creating waypoints with all possible icons shown.
The left-most pane of the menu lists any waypoints the player has created as well as options to remove and search through waypoints.
Creating Waypoints[ | ]
- Right-click a point on the map and select "Save Waypoint".
- Choose an arbitrary icon to represent the waypoint.
- Give the waypoint a short name less than 13 characters.
Tracking Waypoints[ | ]
If you highlight a waypoint in the list and click the compass icon ![]() on the far-left, you will be able to track a waypoint. Tracking a waypoint places it in your compass regardless of your distance from the waypoint, allowing you to navigate straight to the waypoint. You can track multiple waypoints simultaneously. The compass icon
on the far-left, you will be able to track a waypoint. Tracking a waypoint places it in your compass regardless of your distance from the waypoint, allowing you to navigate straight to the waypoint. You can track multiple waypoints simultaneously. The compass icon ![]() is a toggle, so one click turns on tracking for the highlighted waypoint and another click turns off tracking. Which waypoints are being tracked are saved after logging off of a server and out of the game.
is a toggle, so one click turns on tracking for the highlighted waypoint and another click turns off tracking. Which waypoints are being tracked are saved after logging off of a server and out of the game.
Centering Waypoints[ | ]
The second icon from the top left, which looks like a semi-folded map ![]() will show on the map whichever waypoint is highlighted. The map will be centered on the highlighted waypoint.
will show on the map whichever waypoint is highlighted. The map will be centered on the highlighted waypoint.
Removing Waypoints[ | ]
The third icon from the top left ![]() will remove a waypoint from the list entirely.
will remove a waypoint from the list entirely.
Sharing Waypoints[ | ]
And the right-most icon ![]() will share a waypoint to either your allies or everyone.
will share a waypoint to either your allies or everyone.
In the shared waypoints menu pane, you can save shared waypoints, show them on the map, and/or remove them from your list of shared waypoints.
[ | ]
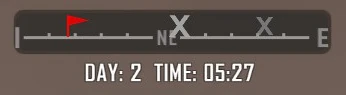
Once you have waypoints added to the map, you then are able to see them represented in your compass, at the top-center of the default screen.
As you get closer to waypoints, their icons in the compass get bigger and more opaque. This provides immediate information regarding how close you are to the waypoint, without having to stop and open the map. Quick waypoints will not change transparency with distance.

On the left of the compass is a red flag representing a quick-save waypoint. At the center is a bright "X" waypoint, and to the right is a smaller dimmer "X" waypoint that is further away.